This project is a print of the “Back-Loaded Horn” Speaker V2.0 by guppyk, which you can find on thingiverse . Aside from some minor modifications in the speaker connections this is a direct print of that project. Check out the project details for more info on how to print this yourself.
First, some context: I’ve been curious about printing more than just more printer parts for a long while. Speakers and audio equipment has been one of those areas, and there are plenty of bloggers and YouTubers experimenting in that space. This is my first foray into that world.
Printing#
It’s worth starting with the fact that this print is large. It’s the largest thing I’ve ever made on the printer, and almost totally fills the print bed. It’s sufficiently large that I couldn’t add any brims or skirts to the print because that would push it outside the dimensions of my print surface. We’ll get onto a review of this design eventually but it hints at the first major challenge I had and that as keeping this print flat.
Also, even when printing with almost no infill, this is still a very long print, and takes a decent amount of filament to print.
That being said, this also lends to the simplicity of this design in that it’s just one part to print. I added an additional small part so that I could install banana connectors rather than just bare wires but that’s otherwise everything. The side panels are designed to be made from sheet wood (plywood or MDF) and that means assembly can be fairly straightforward… in theory…
Assembly#
As mentioned before, keeping this design flat was a real challenge. Given the size of the print, almost all of the speakers I printed has some amount of bed adhesion issues on the base. What I didn’t also expect was that the plywood was also not particularly dimensionally stable and also bent out of shape.
On the subject of the wooden sides, this was left-over wood from another project, which I’ve stained brown using some leftover stain from colouring some IKEA shelving.
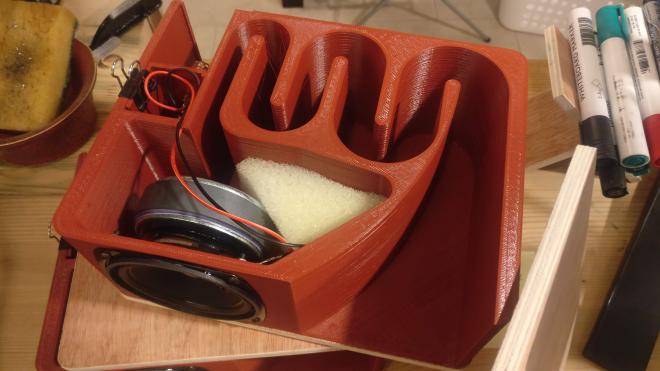
Wiring up the speakers and fitting all the hardware was however, fairly straight forward, and you can see the insides of the speakers here.
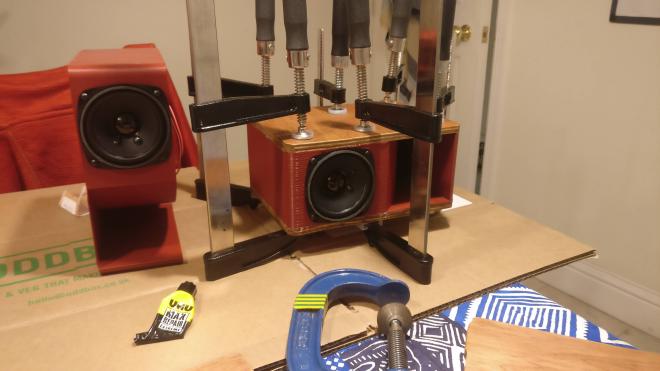
Glue-up#
This was probably the most challenging step, and where it became apparent just how “not flat” all the parts were. I wanted to use a fairly thick glue too to fill some of the gap spaces, but I think in retrospect I brough a knife to a gun fight and the UHU I had lying around was totally out of it’s depth.
Some of the comments on the original design mention construction adhesive which I would totally echo. Something space-filling and very sturdy is totally worth using for this project. I’ve even come back to these speakers months later and filled some remaining gaps with coloured wood filler.