This workbench is heavily inspired by the $30 Workbench project by Rex Krueger. Check out the video on youtube for almost all the inspiration for this project.
With a few woodworking projects coming up (notably the cartwheel light ) I was very keen to get a more sturdy workbench. For the reclaimed shelves I used a cheap folding workbench from Aldi, which worked in the short term, but was far too flimsy for anything except very light use. In particular, I wanted something sturdy enough to use as a surface for planing wood.
The big constraint I had to work with was that I live in a flat. Whatever I build needs to be light enough that I can carry it (ideally inside and outside for messy projects), and it needs to be compact enough that it can live in the flat without issue. That latter point also means it should ideally be multi-purpose and work as a normal bench when not being used as a work bench. Practically I thought something that could double as a piano stool would be perfect.
Bench top#
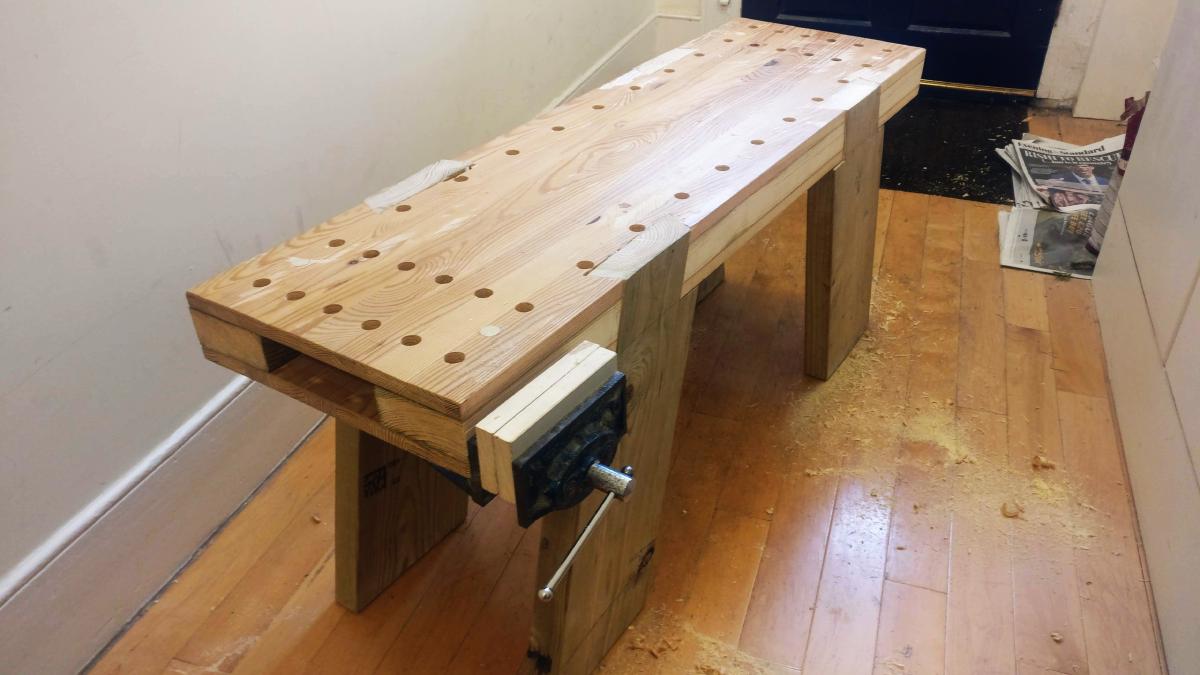
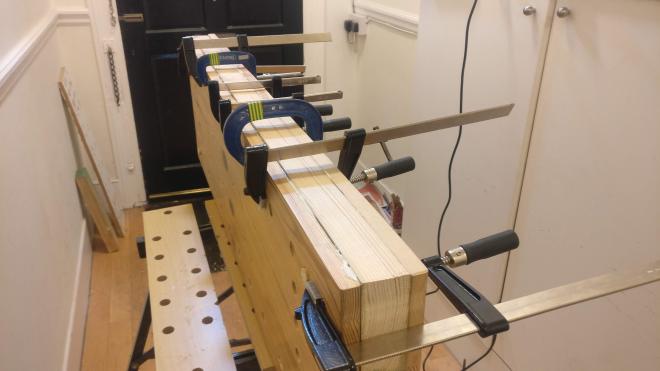
The requirements for the surface of the bench were simple. It needed to be flat (or at least mostly flat), and have dowel pins in it for securing workpieces. I found an old table top on the street, and used it to sandwich two offcuts from the shelving project on either side. Glue together and then with holes drilled for dowels; all fairly easily done.
The resulting surface was fairly flat straight out of the gates, and only needed a little bit of planing to get it to be flat enough.
Legs#
The legs were a little trickier. I wanted something sturdy. This needed to be a sold planing surface and I wanted as little wobble in it as possible. Having originally assumed that I would do some kind of truss or cross arrangement, I couldn’t find a design that I was confident in. Either the struts would be too thin, or the cuts too hard, or the changes of it still being loose were too high.
Instead I opted for a different design: THICK LEGS. Four very sturdy legs, angled so that they’re clear of the ends (and provide extra stability in the lengthwise direction) and with dovetail joints to fix them to the surface to get as much stability there as possible.
Cutting a ~30mm x ~200mm dovetail was not easy, and there was a lot of swearing to get each cut just right, even after getting it about right, it would often also mean really going to town with the mallet to pound in the legs, but, eventually, I got four of them in.

Review#
I’ve since used the bench for a whole host of projects, and it’s been a pretty big success. It’s sturdy enough to do some fairly heavy planing on (especially after adding some wooden feet to it), it’s light enough to carry (just) and it fits through doors to bring inside and outside, and I can use a mixture of dowell pins to hold a variety of workpieces.
What I might add in future are some dowell holes on the side to support longer workpieces while in the side vice, and just get some more pins. But otherwise very pleased 👍.